Maecenas Viverraw$50.00–$70.00Price range: $50.00 through $70.00Select options
This product has multiple variants. The options may be chosen on the product page
Quick Answer: Standard Dartboard Installation Requirements
For those seeking immediate answers, here are the official dartboard mounting specifications:
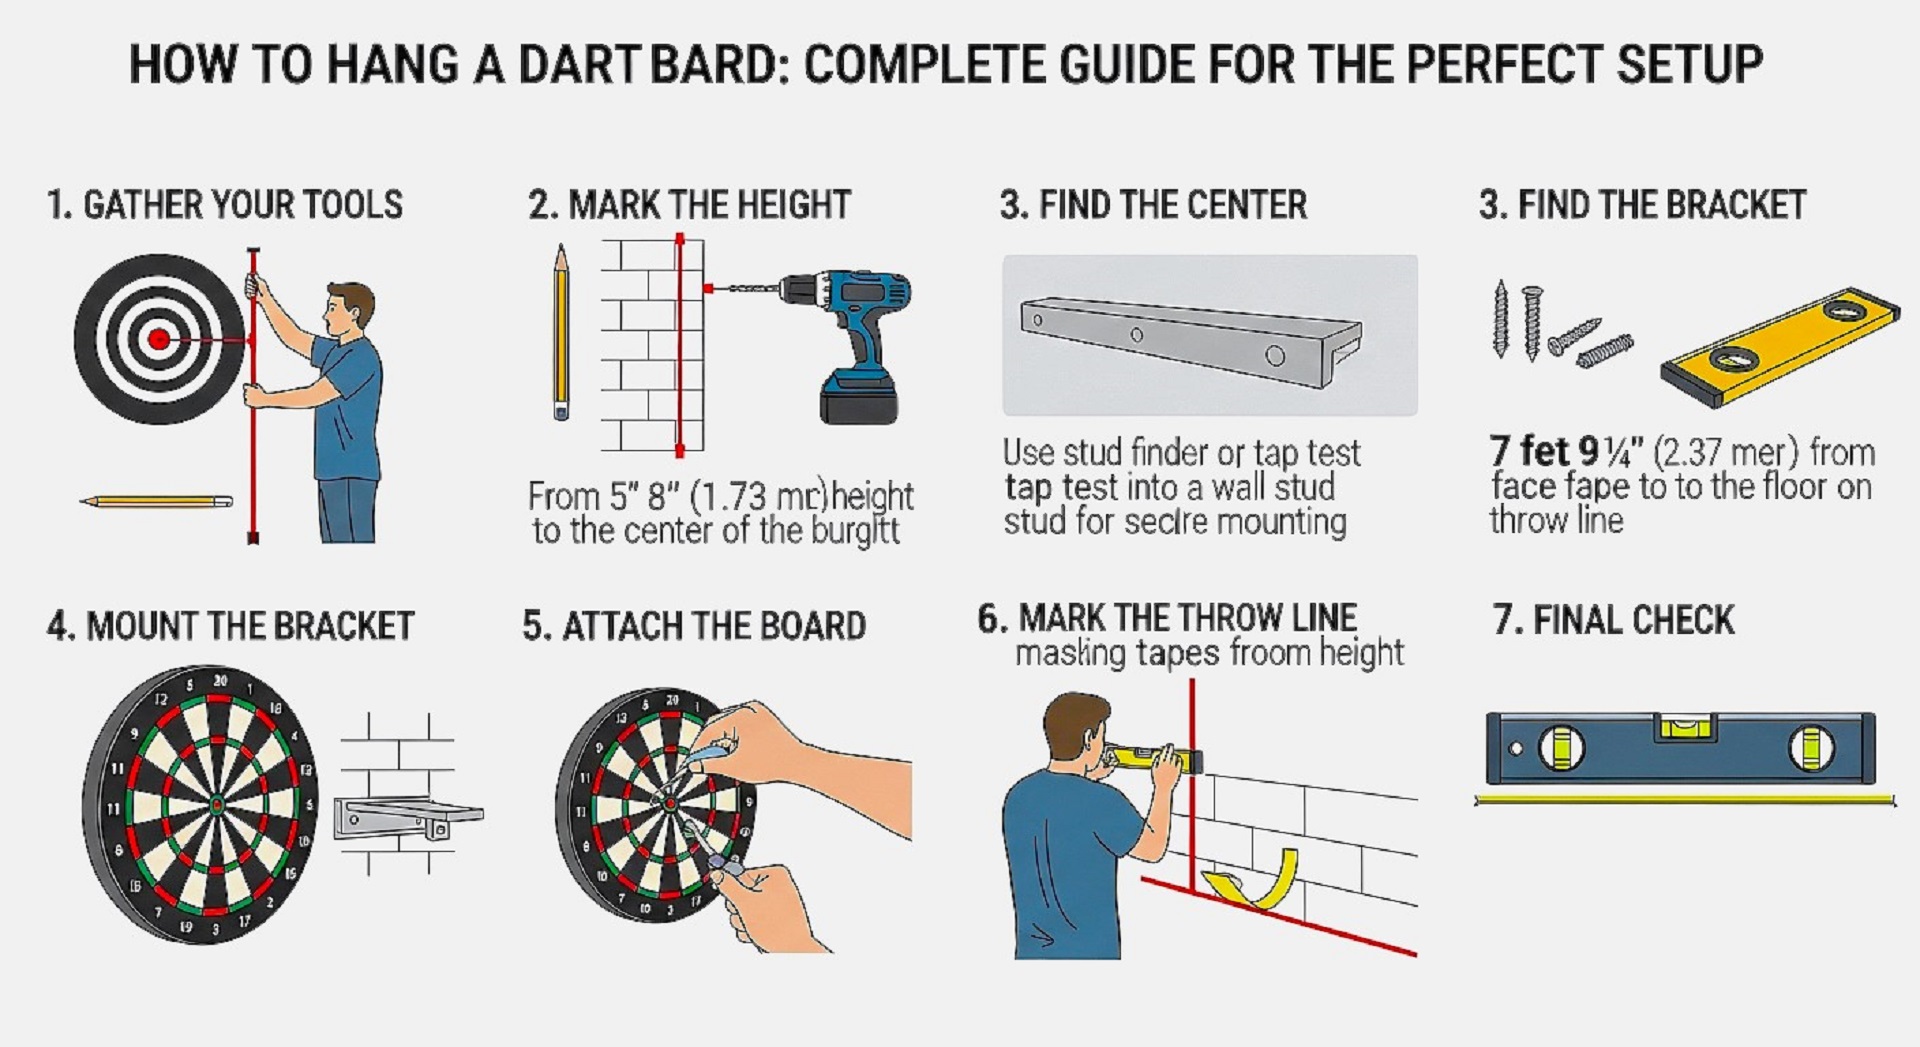
Height: 5 feet 8 inches (1.73m) from floor to bullseye center
Throw Line Distance: 7 feet 9.25 inches (2.37m) measured diagonally from bullseye to floor at throw line
Horizontal Distance: 9 feet 7.5 inches (2.93m) from wall to throw line
Number 20 Position: Top-center of the board
Minimum Clearance: 5 feet to each side, 4 feet behind the throw line
These measurements follow World Darts Federation (WDF) and Professional Darts Corporation (PDC) official regulations.
Understanding Dartboard Types and Installation Requirements
Before you grab your drill, understanding your dartboard type and space requirements ensures a successful installation that lasts for years.
Types of Dartboards
Bristle Dartboards (Steel-Tip)
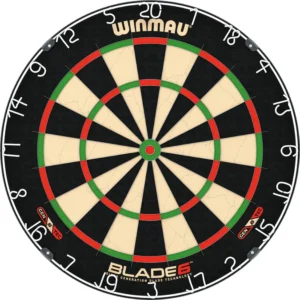
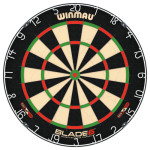
Traditional dartboards made from compressed sisal fibers are the standard for serious players. They typically weigh 10-12 pounds and require sturdy mounting. The self-healing sisal material closes around dart holes, extending board life significantly. Popular brands include Winmau Blade 6, Unicorn Eclipse Pro, and Shot Bandit.
⚡ Electronic Dartboards (Soft-Tip)
These plastic-faced boards feature electronic scoring and typically weigh 5-8 pounds. They require both secure mounting and access to electrical outlets. Many modern electronic boards offer Bluetooth connectivity, automated scoring, and built-in game variations. Leading options include Arachnid Cricket Pro 800, Viper 800, and Gran Board 3s.
Cabinet Dartboards
Complete units with doors that protect the board when not in use and provide scoreboard space. These assemblies can weigh 20-35 pounds and need reinforced mounting solutions. They’re ideal for shared spaces or rooms where aesthetics matter.
Space Requirements Analysis
Measurement Type
Minimum Required
Recommended
Bullseye Height
5 feet 8 inches (173cm)
Exactly 5’8″ – No variation
Throw Line Distance (Diagonal)
7 feet 9.25 inches (237cm)
Exactly 7’9.25″ – Official standard
Horizontal Distance
9 feet 7.5 inches (293cm)
9’7.5″ minimum
Side Clearance
5 feet each side
6-7 feet for comfortable play
Ceiling Height
8 feet minimum
9+ feet to avoid ceiling strikes
Room Depth
12 feet
15 feet for multiple players
Pro Tip: Lighting Considerations
Position your board away from windows to avoid glare and ensure uniform lighting across the board surface. Professional setups use dartboard-specific lighting mounted 3-4 feet in front of the board at a 45-degree angle.
Essential Tools and Materials
Having the right equipment before starting prevents mid-project delays and ensures professional results.
Basic Installation Kit
Power Tools
Power drill with variable speed
3/16-inch drill bit for pilot holes
Masonry bit (for brick/concrete)
Measuring Tools
Tape measure (25-foot minimum)
Level (24-inch or laser level)
Stud finder (electronic preferred)
Pencil for marking
Hardware
3-inch wood screws or lag bolts
Toggle bolts or molly bolts (50+ lbs rated)
Dartboard mounting bracket
Wall anchors as needed
️ Safety & Protection
Safety glasses
Backing board (24″x24″ minimum)
Cork or foam surround
Cable management clips
Selecting the Right Mounting Hardware
Hardware Selection Guide
Mounting Brackets: Quality dartboard brackets feature keyhole slots for easy removal and rotation. Look for brackets made from steel rather than aluminum, with a weight rating exceeding your dartboard’s weight by at least 50%.
Wall Anchors: For drywall installations without stud access, toggle bolts provide the strongest hold, supporting 50-100 pounds each. Molly bolts work well for lighter electronic boards. Standard plastic expansion anchors are insufficient for dartboard mounting.
Screws: Use 3-inch wood screws for stud mounting, ensuring 1.5-2 inches of penetration into the stud itself. For masonry, use 3-inch tapcon screws with a 3/16-inch masonry bit.
Step-by-Step Installation Process
Follow this professional installation sequence for perfect results every time.
Phase 1: Planning and Measurement
1Choose Your Location
Select a wall with adequate surrounding space, away from high-traffic areas, breakable objects, and valuable furnishings. Avoid exterior walls in unheated spaces, as temperature fluctuations damage bristle dartboards. Consider noise transmission—mounting on shared walls with bedrooms or adjacent apartments often causes conflicts.
2Mark the Bullseye Position
Measure 5 feet 8 inches (68 inches or 173cm) from the floor and mark this point on your wall. This represents your bullseye center. Use a level to ensure your mark is perfectly horizontal from multiple reference points, as floors are rarely level.
3Locate Wall Studs
Using a stud finder, locate studs near your marked position. Wall studs in most North American homes are spaced 16 or 24 inches apart. Mark the stud centers with light pencil marks. If your bullseye mark doesn’t align with a stud center, you’ll need to use wall anchors or install a backing board.
4Calculate Throw Line Position
Measure 9 feet 7.5 inches (293cm) horizontally from the wall surface, or use the diagonal measurement of 7 feet 9.25 inches from the bullseye mark to the floor at your throw line. The diagonal measurement is more accurate and accounts for wall thickness. Mark this position with tape, paint, or a permanent throw line.
Phase 2: Wall Preparation
5Install Backing Board (Highly Recommended)
A backing board serves multiple purposes: distributes weight across multiple studs, protects your wall from stray darts, reduces noise, and allows flexible dartboard positioning.
Professional Backing Board Installation:
Cut 3/4-inch plywood or MDF to 36″ x 36″ (minimum 24″ x 24″)
Locate at least two studs within your board area
Position the backing board so your bullseye mark is centered
Drill pilot holes through the backing board into studs
Secure with 3-inch wood screws every 12 inches along stud lines
Cover with cork board, foam tiles, or commercial dartboard surround material
6Attach Mounting Hardware
Most dartboards come with a mounting bracket that attaches to the board’s back. If using the dartboard’s built-in mounting bracket, ensure it’s centered and secure. If installing a separate wall-mounted bracket, position it so the bullseye will be at exactly 68 inches when the board hangs.
Phase 3: Mounting the Dartboard
7Drill Pilot Holes
At your marked positions, drill pilot holes slightly smaller than your screw diameter. For wood screws, use a 3/16-inch bit. For masonry, use the appropriate masonry bit. Pilot holes prevent wood splitting and ensure straight screw insertion.
8Install Wall Anchors (If Not Mounting to Studs)
For drywall installations without stud access, drill holes sized for your specific anchor type, insert toggle bolt anchors or molly bolts according to manufacturer instructions, and tighten until snug but don’t overtighten, as this can crack drywall.
9Mount the Bracket or Board
Hold the mounting bracket at your measured position
Insert screws through bracket holes into pilot holes or anchors
Tighten gradually, alternating between screws to maintain level
Use a level to verify horizontal alignment before final tightening
Ensure the bracket is rock-solid with no movement
10Hang the Dartboard
Lift the dartboard and align its mounting bracket with the wall bracket
Hook the board onto the bracket carefully
Rotate the board so the 20 segment is at top-center
Step back and verify the bullseye height with a tape measure
Check that the board sits flush against the wall with no tilting
11Secure Against Rotation
Many dartboards rotate over time during play. Prevent this by tightening the mounting bracket’s set screw if present, installing a small L-bracket at the board’s bottom edge, using a secondary mounting point at the 6 o’clock position, or applying a small rubber bumper between board and wall.
Phase 4: Final Setup
12Install Surround Protection
Protect your walls with a dartboard surround or backboard. Position surround around the dartboard and secure using the surround’s mounting system or construction adhesive. Ensure no gaps between board and surround where darts can lodge.
13Verify All Measurements
⚠️ Critical Final Checks:
Bullseye height: 5’8″ from floor
Throw line distance: 7’9.25″ diagonally from bullseye to floor at line
Board level: Use a spirit level across the 3 and 11 segments
Number 20 position: Top-center
14Test Stability
Gently push on different areas of the dartboard to test for movement. Any flex or give indicates insufficient mounting and should be corrected before use.
Mounting Methods for Different Wall Types
Different wall constructions require specialized installation approaches. Using the wrong method risks board collapse and wall damage.
Drywall Installation
Standard drywall (also called sheetrock or gypsum board) is the most common interior wall surface in modern homes. It’s only 1/2-inch thick and cannot support dartboard weight alone.
Method 1: Stud Mounting
Strongest Option
Advantages: Maximum stability, supports unlimited weight, no special hardware required
Disadvantages: Location limited by stud positions
Process: Locate studs, install backing board across at least two studs, mount dartboard bracket directly to stud or backing board.
Method 2: Toggle Bolt Installation
No Stud Available
Advantages: Allows precise positioning, very strong when properly installed
Process: Use heavy-duty toggle bolts rated for 50-100 pounds each, minimum of two for electronic boards, three for bristle boards.
Method 3: Backing Board Solution
Most Flexible
Advantages: Best of both methods, adds wall protection, easy repositioning
Disadvantages: Requires more materials
Process: Install 36″ x 36″ backing board secured to studs, mount dartboard anywhere on the backing board surface.
Brick or Masonry Installation
Masonry Installation Process:
Mark your mounting positions precisely
Use a 3/16-inch masonry bit with a hammer drill
Drill holes 2.5-3 inches deep
Clean dust from holes using compressed air or a vacuum
Insert plastic anchors or use tapcon screws directly
Tapcon screws bite into the masonry and are extremely secure
Critical Tips: Never drill into mortar joints—they’re weaker than brick. Use proper PPE including safety glasses and dust mask. Drill at slow speed with steady pressure.
Plaster Over Lath Installation
Older homes often have plaster walls over wooden lath. These walls are stronger than drywall but more brittle.
Plaster Installation Approach:
Locate studs using a strong magnet to find nails in lath
Drill pilot holes carefully to prevent plaster cracking
Use wood screws directly into studs when possible
For non-stud mounting, use toggle bolts (plaster is thick enough to support them)
Apply painter’s tape over drilling area to reduce cracking
Concrete Wall Installation
Poured concrete or concrete block (common in basements and garages) requires specific techniques:
Use a rotary hammer drill for easiest drilling
Install tapcon concrete screws or sleeve anchors
Ensure 2-3 inches of concrete penetration
For hollow block, use toggle bolts designed for concrete block
Consider a backing board to distribute weight across multiple mounting points
Wood Paneling or Stud Installation
Exposed wood surfaces or wood paneling over studs are the easiest installation surfaces. For structural wood, mount directly using 2.5-3 inch wood screws. This is the strongest possible mounting when done correctly.
Electronic vs. Bristle Dartboard Installation
While the basic mounting principles remain the same, electronic and bristle dartboards have unique installation considerations.
Electronic Dartboard Installation Specifics
Power Management
Most electronic dartboards require AC power. Plan your installation around outlet access:
Position board within 6 feet of an outlet (avoid extension cords if possible)
Route power cables along baseboards or through cable channels
Use cable clips to secure wires against the wall
Consider installing a new outlet behind the board for a clean look
Some advanced boards like Gran Board run on batteries, eliminating outlet requirements
Weight Considerations
Electronic boards typically weigh 5-8 pounds—significantly less than bristle boards. This makes them suitable for toggle bolt installation without studs, mounting on weaker wall surfaces, and temporary or rental-friendly installations.
Segment Alignment
Electronic boards have fixed segment positions determined by the electronic sensors. You cannot rotate these boards like bristle boards, so initial mounting accuracy is critical.
Bristle Dartboard Installation Specifics
Weight Distribution
Quality bristle dartboards weigh 10-12 pounds, plus the bracket hardware. Always use stud mounting or proper wall anchors. Consider a backing board for additional support and wall protection. Never rely on drywall anchors alone for long-term installation.
Rotation Capability
Board Rotation for Longevity
Bristle boards should be rotated regularly (every few months) to ensure even wear. Install mounting systems that allow easy removal and rehang. Don’t over-tighten mounting hardware. Mark rotation schedule on your calendar. Rotating adds years to board life and maintains consistent playing surface.
Noise Reduction
Bristle dartboards create more noise than electronic boards when darts strike. Install cork or foam backing board to absorb sound. Consider rubber washers behind mounting brackets. Avoid mounting on shared walls with bedrooms.
Cabinet and Backing Board Installation
Professional-looking setups often include cabinets or decorative backing boards that serve both functional and aesthetic purposes.
Dartboard Cabinet Installation
Cabinet Type
Weight Range
Mounting Requirements
Basic Wood Cabinets
15-20 pounds
2 studs or heavy-duty anchors
Premium Hardwood Cabinets
25-35 pounds
2-3 studs required
Electronic Board Cabinets
20-30 pounds
2 studs + power access
Cabinet Installation Process
Determine Cabinet Position: Measure from the floor to where the bullseye will be (68 inches). Account for cabinet design—bullseye may not be centered vertically.
Locate Studs or Install Backing Board: Cabinets require rock-solid mounting due to their weight. Find at least two studs within the cabinet width.
Install Mounting Hardware: Most cabinets use keyhole hangers or French cleats. French cleats provide the strongest, most adjustable mounting.
Hang and Adjust Cabinet: With a helper, lift cabinet onto mounting hardware. Ensure it sits flush against the wall.
Install Dartboard Inside Cabinet: Mount the board bracket to the cabinet back and verify bullseye height.
⚠️ Cabinet-Specific Considerations:
Doors add 3-5 inches to the overall width when open
Ensure adequate side clearance for door operation
Cabinet doors can create shadows on the board—consider internal lighting
Chalk or marker scoreboards require maintenance cleaning
DIY Backing Board Construction
Materials Selection:
Base Layer: 3/4-inch plywood or MDF (36″ x 36″ minimum)
Surface Layer: Cork board, dense foam, or carpet remnant
Frame (Optional): 1×4 lumber for finished edges
Mounting: 3-inch wood screws, construction adhesive
Construction Steps:
Cut Base to Size: Standard size: 36″ x 36″ (covers most errant throws) or Large size: 48″ x 48″ (maximum protection)
Add Surface Protection Layer: Apply construction adhesive to base, press cork board or foam firmly onto base, allow adhesive to cure 24 hours
Optional: Add Decorative Frame: Cut 1×4 lumber to frame perimeter, miter corners at 45 degrees for professional appearance
Mount Backing Board to Wall: Follow stud mounting procedures, use at least 6-8 screws distributed across stud locations
Install Dartboard on Backing Board: Mount dartboard bracket to backing board using shorter screws (1.5-2 inches)
Common Installation Mistakes to Avoid
Learning from others’ mistakes saves time, money, and wall damage. Here are the most frequent dartboard installation errors and how to avoid them.
Measurement and Height Errors
❌ Mistake 1: Incorrect Bullseye Height
Many installers measure 5’8″ to where they think the bullseye will be, but don’t account for how the mounting bracket positions the board.
✓ Solution: After mounting, always verify the actual bullseye height with a tape measure before playing. Make adjustments if necessary.
❌ Mistake 2: Wrong Throw Line Distance
Using the horizontal measurement (9’7.5″) without accounting for wall thickness or baseboards creates an incorrect playing distance.
✓ Solution: Always use the diagonal measurement (7’9.25″ from bullseye center to floor at throw line). This method is more accurate and accounts for all wall variations.
❌ Mistake 3: Floor Isn’t Level
Assuming your floor is level and measuring from it creates mounting errors.
✓ Solution: Use a laser level or water level to create a true horizontal reference line, then measure from that.
Mounting and Hardware Errors
❌ Mistake 4: Insufficient Anchoring
Using plastic drywall anchors or mounting directly to drywall without studs leads to eventual board collapse.
✓ Solution: Always mount to studs, use proper toggle bolts, or install a backing board. Never take shortcuts on mounting hardware.
❌ Mistake 5: Wrong Screw Length
Using screws that are too short doesn’t provide adequate hold; too long and they penetrate through the other side of the wall.
Renters and those who want to avoid permanent wall damage have several options for no-drill installations.
Free-Standing Dartboard Stands
Commercial dartboard stands eliminate wall mounting entirely. Portable and movable with no wall damage whatsoever. Can be used indoor or outdoor. Typically cost $80-200.
Portable Dartboard Cabinets
These lean against walls without fasteners. Weighted base provides stability. Includes score tracking and storage. Limited to lighter electronic boards.
Command Strips Method
For very light electronic boards under 5 pounds only. Use heavy-duty Command picture hanging strips. Requires smooth wall surface. Follow weight limits strictly. Not recommended for regular use.
Hanging a Dartboard Over a Fireplace
⚠️ Critical Safety Considerations:
Never mount directly above an active fireplace
Heat damages dartboards and creates fire risk
Minimum 5 feet clearance above fireplace opening
Ensure mantle doesn’t interfere with stray darts
Consider heat shield if fireplace is used regularly
Installation Approach: Brick fireplace surrounds provide excellent mounting surfaces. Use masonry anchors in brick (not mortar). Verify adequate height—fireplaces often prevent proper bullseye positioning.
Basement and Garage Installations
Basement Installation Considerations:
Moisture Control: Use moisture-resistant backing board materials (treated plywood, PVC)
Temperature Extremes: Store bristle boards indoors when not in use in extreme climates
Wall Construction: Garages often have exposed studs (easiest installation)
Vehicle Clearance: Ensure adequate space when vehicles are parked
Dust and Debris: Use protective covers when not in use
Outdoor Dartboard Installation
Weather Protection Requirements:
Covered Area: Install under porch roof, awning, or pergola
Rain Protection: Board must be shielded from direct rain exposure
Sun Exposure: Avoid direct sunlight which fades boards and warps materials
Temperature Range: Check manufacturer specifications (typically 32-100°F)
Humidity Control: High humidity damages bristle boards and electronic components
Maintenance for Outdoor Installations: Cover board with weatherproof tarp when not in use. Inspect regularly for moisture damage, rust, or corrosion. Bring indoors during extreme weather.
Advanced Installation Techniques
Professional-Grade Lighting Installation
Optimal Lighting Configuration:
Position: 36-48 inches in front of dartboard, 12-18 inches above bullseye height
Angle: 45-degree downward angle toward board face
Type: LED strip lights, dedicated dartboard lights, or adjustable spotlights
Color Temperature: 4000-5000K (neutral white) for accurate color perception
Brightness: 800-1200 lumens minimum
Commercial Dartboard Lighting Systems:
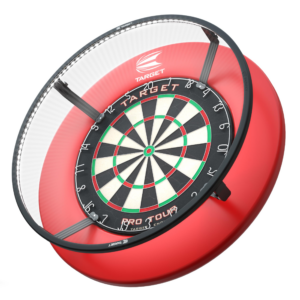
Corona Vision lighting rings (mount around dartboard perimeter)
Target Corona dartboard light
Winmau Plasma dartboard light
Benefits: Designed specifically for dartboards, eliminate shadows completely
Multi-Board Installations
Spacing Type
Minimum
Recommended
Distance Between Bullseyes
6 feet
8-10 feet
Side Clearance Beyond Outermost Boards
5 feet
6-7 feet
Installation Approach: Install single large backing board spanning both boards. Use consistent mounting height and throw line distance. Coordinate power access for multiple electronic boards.
Creating a Tournament-Standard Setup
Professional Standards Checklist:
✓ Bullseye height: 5’8″ (verified with precision level)
✓ Throw line: 7’9.25″ diagonal measurement
✓ Official oche (throw line): Raised wooden platform 1.5″ high, 24″ deep
A: No. Doors are unstable, hollow-core construction cannot support weight, and constant movement damages both door and board. Always mount to a solid, stationary wall.
Q: How do I hang a dartboard so it doesn’t spin?
A: Use multiple mounting points, tighten set screws on the bracket, install an anti-rotation L-bracket at the board’s bottom, or add a rubber bumper between board and wall.
Q: What’s the best height for children’s dartboards?
A: For children under 10, lower the bullseye to 4-5 feet and reduce throw line distance to 5-6 feet. Maintain proper proportions as they grow and transition to regulation height around age 12-14.
Q: Can I mount a dartboard to a stud wall without drywall?
A: Yes, exposed stud walls provide the strongest mounting surface. Use 2.5-3 inch wood screws directly into studs. This is ideal for garages and unfinished basements.
Q: How much weight can drywall anchors hold for dartboards?
A: Standard plastic anchors hold only 10-20 pounds—insufficient for dartboards. Use toggle bolts rated for 50-100 pounds each, with minimum two anchors for electronic boards, three for bristle boards.
Q: Should I mount a dartboard in a basement?
A: Basements work well if you control moisture, maintain temperature above 50°F, and provide adequate ceiling height. Use moisture-resistant backing boards and store bristle boards indoors during extended non-use.
Q: How do I hang a dartboard flush to the wall?
A: Some mounting bracket designs inherently create gaps. Solutions include: select low-profile brackets, recess the mounting hardware into the wall slightly, or install a backing board that allows the board to sit flush.
Q: What’s the regulation height for soft-tip vs. steel-tip dartboards?
A: Both use the same regulation height: 5 feet 8 inches to bullseye center. Throw line distance is also identical at 7 feet 9.25 inches (diagonal measurement).
Q: How often should I rotate my bristle dartboard?
A: Rotate every 2-3 months during regular use, or when you notice the 20 segment showing significant wear. Simply remove the board, rotate 60-90 degrees clockwise, and remount. This extends board life by years.
Q: Can I use Command strips to hang a dartboard?
A: Only for very light electronic boards under 5 pounds, and not recommended for regular use. Command strips cannot handle the repeated impact forces from dart throws and will eventually fail.
Q: How do I hang a dartboard in an apartment without damaging walls?
A: Use a free-standing dartboard stand, portable cabinet with weighted base, or obtain landlord permission for professional installation with restoration plans. Document wall condition before and after installation.
Conclusion: Keys to Perfect Dartboard Installation
Installing a dartboard correctly transforms a simple game into a professional playing experience. The difference between a proper installation and a rushed job becomes apparent within days—wobbly mounts, incorrect measurements, and wall damage reveal themselves quickly.
Essential Success Factors
Key Takeaways:
Measurement Precision: The foundation of every good installation is accurate measurement. Verify the 5’8″ bullseye height and 7’9.25″ diagonal throw line distance multiple times before drilling.
Proper Mounting: Never compromise on mounting hardware. Invest in stud mounting, proper toggle bolts, or backing board installation.
Wall Protection: Backing boards aren’t optional—they’re essential. Even expert players miss occasionally.
Environmental Awareness: Consider temperature, humidity, lighting, and noise transmission during location selection.
Long-Term Maintenance Mindset
Installation is just the beginning. Regular maintenance checks, periodic rotation (for bristle boards), and prompt attention to any loosening or damage keeps your setup functioning perfectly for years. Schedule quarterly inspections and address issues immediately—small problems become big problems fast.
Making It Your Own
While this guide provides professional standards and best practices, your installation should ultimately serve your needs. Adapt these guidelines to your space, budget, and playing style. The perfect dartboard setup is one that you’ll use regularly, maintains safety and proper measurements, and brings enjoyment for years to come.
Ready to Get Started?
Whether you’re setting up your first board or upgrading an existing installation, taking time to do it right pays dividends in playing experience, board longevity, and preserved wall integrity. Follow these guidelines, avoid common mistakes, and you’ll create a dartboard setup worthy of any player—from beginner to professional.
Now grab your tools, measure twice, drill once, and create the perfect dartboard setup. Game on!
Additional Resources
Recommended Tools and Products
Dartboards
Winmau Blade 6 Triple Core (premium bristle)
Unicorn Eclipse Pro (quality bristle)
Arachnid Cricket Pro 800 (electronic)
Gran Board 3s (smart electronic)
Shot Bandit (professional bristle)
Mounting Hardware
Viper Dart Defender Pro Backboard
Winmau Dartboard Surround
Heavy-duty toggle bolts (rated 100+ lbs)
Professional mounting brackets
Dartboard mounting kit complete sets
Lighting
Target Corona Vision Ring Light
Winmau Plasma Dartboard Light
LED strip lights (4000-5000K)
Adjustable spotlight systems
Accessories
Shot Darts Official Oche Mat
Laser throw line projector
Professional level (24-inch)
Electronic stud finder
Dartboard rotation reminder system
Official Governing Bodies & Standards
Regulatory Organizations:
World Darts Federation (WDF): International governing body for amateur darts, establishes official regulations and measurements
Professional Darts Corporation (PDC): Premier professional darts organization, sets tournament standards
American Darts Organization (ADO): Governing body for darts in North America
For competitive play rules, advanced techniques, and tournament regulations, consult these official organizations. They provide comprehensive resources for players at all skill levels.
Installation Checklist Printable
Pre-Installation Checklist:
☐ Measured wall space (minimum 10′ wide × 12′ deep)
☐ Located wall studs or planned backing board installation
☐ Gathered all tools and materials
☐ Purchased appropriate mounting hardware for wall type
☐ Verified ceiling height (minimum 8 feet)
☐ Planned lighting installation
☐ Checked with landlord/HOA if applicable
☐ Obtained backing board/surround materials
Installation Day Checklist:
☐ Marked bullseye position at 5’8″ from floor
☐ Verified level with precision tool
☐ Installed backing board (if using)
☐ Drilled pilot holes
☐ Mounted bracket securely
☐ Hung dartboard with 20 at top
☐ Measured throw line at 7’9.25″ diagonal
☐ Marked throw line on floor
☐ Installed surround protection
☐ Tested stability with gentle pressure
☐ Routed power cable (if electronic)
☐ Installed lighting
☐ Final measurement verification
Safety Guidelines & Legal Considerations
Household Safety
⚠️ Critical Safety Rules:
Child Safety: Keep darts secured away from children (lockable cabinet). Install board above children’s reach when possible.
Clear Throwing Area: Maintain clear throwing area free from obstacles. Establish clear safety rules for all players.